Mouthguard Fitting Instructions
Controlled Chaos Combat · Official Packaging Guide
Before you start: you get 2 minutes
VPS putty has 2 minutes of working time for mixing and tray loading. Read all 11 steps and prepare a timer before opening the containers.
Watch the full tutorial
About 1.5 minutes. Watch it once before you open the putty, then follow the steps below.
Phase 1 of 3
Before you open the putty
Steps 1–2. No clock running yet: get everything ready.
Wash and Dry Your Hands
Wash your hands thoroughly and dry them completely. Do not mix VPS putty with wet hands. Moisture can affect the material and make the impression less accurate.
Test the Tray Fit
Place the empty tray in your mouth before mixing the putty.
- Cover all upper teeth
- Not pinch hard against your gums
- Have enough room for putty around the teeth
Remove the tray and wipe dry after checking the fit.
Phase 2 of 3
The timed impression
Steps 3–8. Two minutes to mix and load, then three minutes in your mouth. Start a timer.
Mix the Putty
Take out both of the blue base and white catalyst. Knead them together quickly until the color becomes fully uniform with no white streaks.
You have 2 minutes total working time to mix, shape, load, and insert the putty. Mix continuously until the color is uniform, then move directly to tray loading.
Roll the Putty
Roll the mixed putty into a smooth log shape. Make it long enough to fill the full arch of the tray from left molars to right molars.
Load the Tray
Press the putty evenly into the tray. Make sure the putty is Centered, Smooth, Thick enough in the front, and Spread all the way to the back molar areas. Do not leave thin spots.
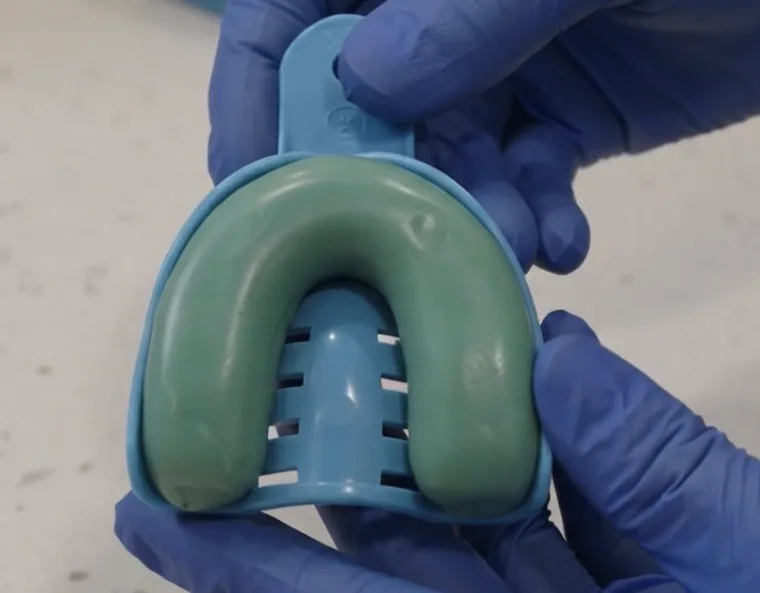
Insert the Tray
Using a mirror, place the tray into your mouth and center it over your upper teeth.
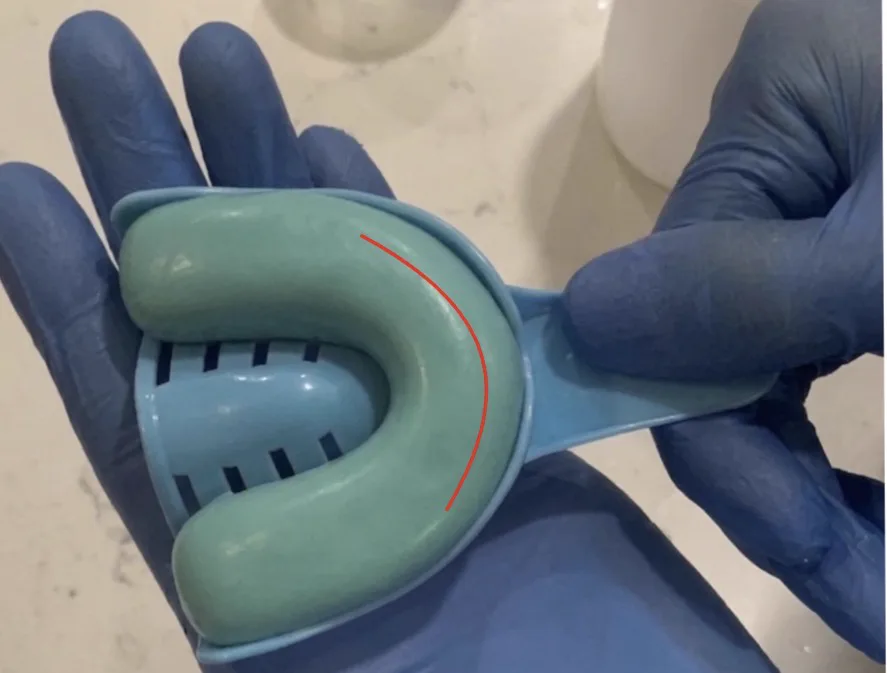
Bite directly into the center of the putty, aligning your teeth evenly.
firmly bite down straight ( DO NOT BITE TWICE ) until you cannot bite down any deeper.
Put your top lip over the tray.
Make sure the putty fills up your upper lip, capturing your gums all the way.
Hold Still & Lock Position
Once seated, the tray must stay perfectly static. Do not let it shift, tilt, or drop even slightly.. gently rest your lower teeth against the bottom of the tray. keep your mouth closed to maintain the seal.
After the tray is inserted and seated, keep it in your mouth for 3 full minutes. Stay still and silent while the material sets.
Remove the Tray
Once fully set, remove the tray carefully. Pull straight down with slow, even pressure. Do not twist aggressively. You can wiggle it slightly to help it release.
Phase 3 of 3
After it sets
Steps 9–11. Check it, rinse it, send it back.
Check the Impression
A good impression should show:
- • Clear detail of every tooth
- • Full gumline around the teeth
- • Deep molar detail
- • No dragging or smearing
- • No teeth touching tray bottom
- • No missing front/back teeth
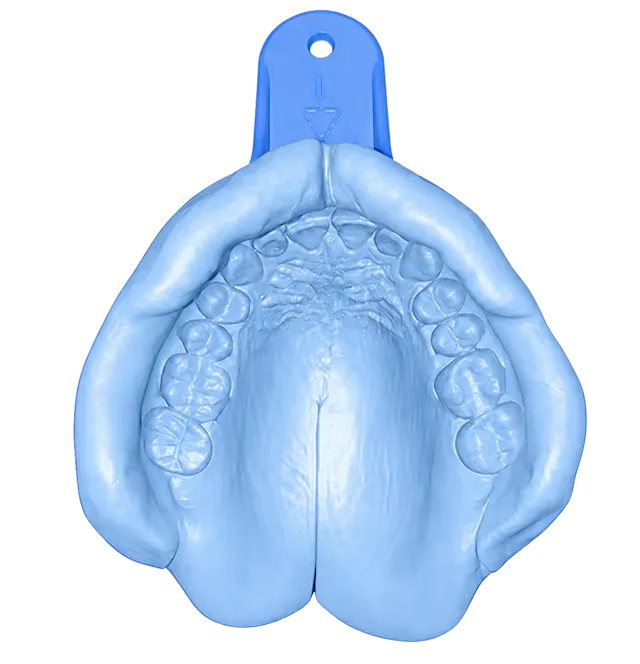
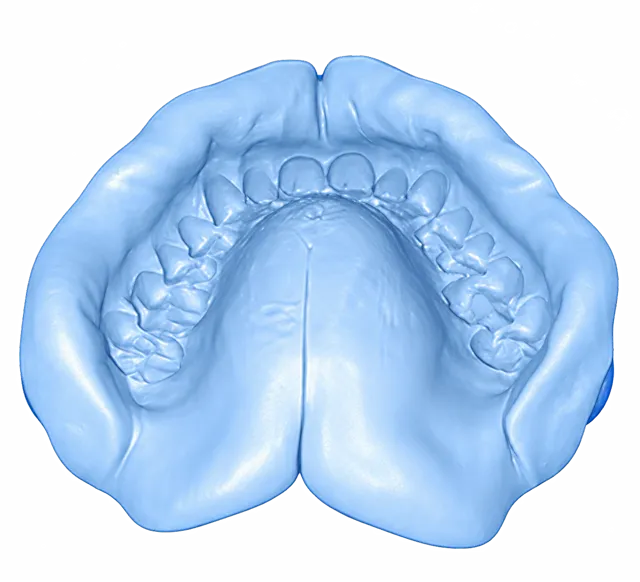
Not sure if yours is good enough? Send us a photo before you mail it.
We will check it and tell you whether to send it or re-take it. This takes a minute and saves you a whole shipping cycle.
Rinse and Dry
Rinse the impression under cold water and pat it dry. There is no waiting period. Put it straight back into the package it arrived in and send it to us. Avoid touching the fine tooth detail inside.
Pack and Return
Place the finished impression back into the kit box. Return it with the return QR code in your email: show it at any USPS counter and they print the label. Once we receive your impression, we will fabricate your custom-fit mouthguard and send the finished guard back to you.